I'm not exactly sure how it happened, but I somehow convinced my boys to have a combined birthday party this year....thank God! After much discussion we decided to have the party at an indoor trampoline facility called Sky Zone that just opened a few weeks ago.
When I booked the party I was given a stack of pre-printed invitations as a part of the package. Normally the craft-snob in me would scoff at these invitations, but I waited so late that I felt forced to use them. Or so I thought. When I pitched the idea to my kids, my oldest looked at me and said (cue the sad music) "but Mom, you always make our invitations". Ouch. I desperately tried to come up with valid reasons that a soon-to-be 9 year old would buy as to why I would not be making the invitations this year, but to no avail.
I had just started putting a design together when my youngest son declared that he would really love to have a pop-up card. Really? I only had 3 days to design and construct these invitations, so a pop-up card (that I've never made before) might be a stretch. And then my son gave me "the look". Needless to say, I made the invitations. Here is the outside of the card...
...and here is the inside - my kids are "jumping" out of the invitation. Please note that the enormous heads were my husband's idea - apparently it has something to do with sports.
Here's how the pop-up effect works - I found directions for this here.
I didn't care for the design on the cake that was included with the party package, so I decided to make a cake topper instead. I made a trampoline with the boys (again with big heads) jumping on it.
The trampoline was made out of foam paper and popsicle sticks...
Now that I had created custom invitations and a custom cake topper, I decided to complete the trifecta and create custom banners for the party. Each banner had my kid's name...
...and a birthday boy jumping on a trampoline.
According to my guys the party was a big success, so Birthday 2013 is officially a wrap!
Thursday, March 28, 2013
Thursday, March 14, 2013
Over the Ribbon Rainbow
I don't consider myself to be a cocky person, but the other day I found myself walking down the aisles of Hobby Lobby thinking "I can make that" to everything I saw. But I started a project last week that made me eat those very words! I absolutely love ribbon wreaths - here's one that made me smile. So, with me being crafty and all, I figured I could make one with no problem - I mean it's just ribbon!
I decided to make a St. Patrick's Day-inspired wreath...
...and it took FOREVER! After cutting and gluing each little strand of ribbon I thought I was going to have a breakdown!
Much respect to all of you ribbon wreath makers out there - you all are a patient lot! Thanks for the inspiration, but I'm sticking with foam paper as my go-to choice of craft material!
Labels:
hot glue,
pot of gold,
rainbow,
ribbon,
St. Patrick's Day,
wreath
Thursday, February 14, 2013
Valentine's Day Already?
I know it happens every year, but I was completely unprepared for Valentine's Day this time. Last week I kind of acknowledged that I should start preparing things when the V-Day class lists came home from school. However it wasn't until yesterday morning when my youngest son asked me what he was handing out that I really started to panic. Thank God for all of the crafty people out there who graciously share their creative ideas on the net! I did a quick search and stumbled upon an adorable idea for a V-Day card here.
So, here is my attempt at what I'm calling a Cupid Ninja Tootsie Pop Card.
I used the following materials - Tootsie Pops, white tissue paper, tape and red raffia ribbon.
I found a free image of a flying ninja on the internet and printed it on cardstock paper (I modified the image to remove the head). I then folded the paper in half and punched a 3/4" hole along the crease where the head would be...
Finally I printed out some eyes on label paper and put the whole ninja together. Here's the result...
Oh wait, did I mention that I started constructing these at 9pm last night and that I had to make 40 of them? And yes, it took forever!
I hope you were more prepared for this day than I was. Have a wonderful Valentine's Day!
Labels:
Custom Cards,
lollipop,
ninja,
tootsie pops,
Valentine's Day
Thursday, January 3, 2013
2012 Top Ten List
Okay I know we're already 5 days into the New Year, but I thought it would be fun to see which posts made the top 10 list for 2012. So please bear with me as I take a quick stroll down memory lane.
#10 - Patriotic Wreath
#9 - Easter Egg Magnets
#8 - Tulip Bouquet
#7 - Blumebox Design
#6 - V-Day Card Design
#5 - March Birthday Invitations
#4 - St. Patrick's Day Decor
#3 - Easter Chick Lantern
#2 - I Heart Rice Krispy Treats
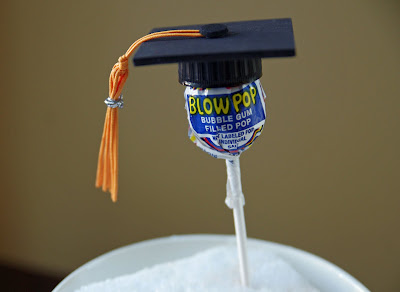
#1 - Graduation Pops
Thanks - hope you're having a fantastic 2013 so far!
Monday, December 31, 2012
Last Minute DIY New Year's Day Hostess Gifts
My family is going to a New Year's Day brunch party tomorrow, so I had to come up with an idea (or two) for a hostess gift. Despite the fact that I've known about the party for well over a week, I somehow waited until the last minute (TODAY) to pull something together. So, here are a couple of DIY gifts that don't take too long to assemble and won't break the bank!
Gift Idea #1: Single Serve Mimosas
I thought it would be cute to give do-it-yourself individual mimosas to the party hostess. Here's what you need...
One 12 oz bottle of Orange Juice
One 187 mL bottle of Champagne
One plastic champagne flute
One small box - I got this one from Hobby Lobby
I padded the box with some fabric scraps and printed out a label for the interior...done!
Gift Idea #2: Coffee, Coffee, Coffee
I'm a Dunkin Donuts coffee girl, so I am sharing the love with the party hostess. I thought it would be fun to come up with a unique card to accompany the coffee. All you need to create the card is hot glue, coffee beans...
and (according to my oldest son) a bad sense of humor...
Wishing you all a very Happy New Year's!
Labels:
champagne,
coffee beans,
gifts,
mimosa,
new year's day party,
orange juice
Thursday, November 29, 2012
Heading South for the Winter...
I am completely in denial that November is over - it went by way too fast!
On the contrary, I'm guessing that turkeys are letting out a collective sigh of relief and excitedly hanging up their feathers until next Thanksgiving...
Labels:
feathers,
foam paper,
pilgrim hat,
Thanksgiving,
turkey,
wire hanger
Tuesday, November 13, 2012
Monopoly Moguls in Training
My family recently joined an organization called Jack & Jill of America that provides amazing social and educational programming for African-American children. Each month parents have the opportunity to plan and execute themed activities for the kids. Last weekend I helped create a finance-themed event for my oldest son's group. Fortunately I was paired with a mom named Loren who literally bleeds creativity. She came up with the brilliant idea of teaching financial literacy through the use of a human monopoly game. We created a life-sized game board and the kids (in teams of two) were the game pieces. One team member was responsible for the money and the other held the deeds as they moved around the board. I'll jump to the punchline and tell you that the kids had an absolute blast playing the game! Here are some of the pics from the event...
Loren is the owner of a stationery company called Statianery, so needless to say she created all of the printed products for the event. Those products included:
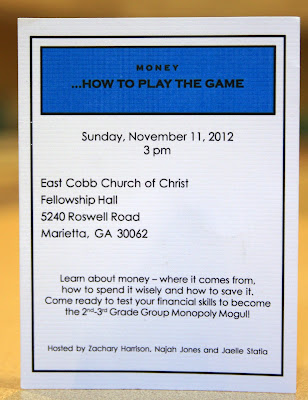
Invitations...
Personalized Wallets for each child...
Life-sized Dice...
Water Bottle Labels...
Food Signs (the kids had to "buy" their own lunch)...
Custom Monopoly Money...
I had the pleasure of creating monopoly-themed centerpieces for the event. Those centerpieces included:
Monopoly House and Hotel Game Pieces...
Mr. Monopoly...
Various Monopoly Game Pieces...
In addition to playing the monopoly game, we also reviewed financial concepts and handed out this interactive booklet that has great activities about money for kids.
I would definitely recommend the human monopoly game for both kids and adults!
Labels:
dice,
finance games for kids,
game pieces,
monopoly game,
Mr. Monopoly
Subscribe to:
Posts (Atom)