Monday, January 24, 2011

I Heart Hershey Kisses!

While creating another do-it-yourself Valentine's Day craft (future post), I was left with a ton of small cut-out hearts. My first thought was to go against my hoarder tendencies and toss them out, but they were too stinking cute to throw away!


I just bought several bags of Hershey kisses to make Valentine's Day cards for my kids (look for a future post on this as well). So I thought it would be fun to try to make the kisses look sweeter than they taste. Here's my best attempt...


This turned out to be one of the easiest things I've ever made. Simply tape the cut-out heart onto the Hershey tag - that's it!


Please check back for more easy Valentine's Day crafts soon!

Thursday, January 20, 2011

Home Improvement-inspired Valentine's Day Ideas

I have spent the past 2 days trying to de-clutter my house...with very little progress I'm sad to say. I don't know if the creative side of my brain was working overtime or if I was just incredibly bored with cleaning, but somehow I kept finding inspiration for Valentine's Day crafts as I came across basic household items. So, I felt compelled to take a small break from cleaning to put together some of these ideas - and I emphasize the word 'small' because each item took very little time to make. Sorry in advance for the sappy titles for the ideas - I get a little caught up around Valentine's Day!

Idea #1: Stuck on You Card

Household Item Used - Duct Tape

I really love simple designs on cards, so I cut out a heart from a piece of red duct tape and attached it to a white card - easy!


Idea #2: Hugs & Kisses You Won't Want to Wipe Off

Household Item Used: Sponges

A while ago I read an article about making custom stamps using sponges, but never tried it until now. I cut out an 'X' and an 'O' from the sponge freehand, but after seeing them I would definitely recommend using a template!


Dip the sponge in paint and apply it onto whatever you want to embellish - in this case I used gift bags.


Idea #3: I Heart You Frame

Household Items Used: Shelf Liner & Spray Paint

I have a stash of pictures (like of the kids sitting on Santa's lap) that I only pull out at Christmas time to decorate rooms. Instead of having to change out pictures each holiday, I thought it would be cool to embellish the glass in the picture frame and change that out instead. First I cut out a heart shape using adhesive shelf liner that I found buried in a cabinet. Attach the heart-shaped liner directly onto the glass.


Then apply spray paint over the entire surface of the glass and let it dry. Once dry, remove the shelf liner heart and place the glass back in its' original frame - that's it!


That was fun, now back to cleaning...

Tuesday, January 11, 2011

A Baby Shower

Sorry for the repost - even after doing this for a year I still have technical blogging issues!
--------------------------------------------------------------------------------------------------------------------------

I recently had the opportunity to help throw a shower for a friend who is expecting a baby girl. I have two little boys who I love and adore, but it was an absolute blast being surrounded by nothing but pink while planning this event! Here are some of the items I made for the shower.

The Invitation

I stumbled across an adorable design for an invitation while surfing the web. This is the version that I made...


You can find the directions to make the invitation pictured above here. Unfortunately, shortly after I made the invitation I realized that they're pretty labor-intensive and that I would never finish all of them on time. So, I decided to tweak the design a little without sacrificing the cuteness. Instead of making the onesie out of cardstock, I cut the shape out using scrapbook paper and attached it to a folded card. Much easier!


The Favor

I once again turned to the web for inspiration for the shower favors and one of my favorite bloggers did not disappoint. Bakerella, who comes up with some of the most amazing baked goods I've ever seen, created a gift of dry cookie mix for a friend - here is her post. I thought this would make a great shower favor, so I simply added a nipple and a ribbon on top of the jar to make it look like a baby bottle...


Bakerella graciously included printable baking instructions in her post - I printed them on clear label paper and attached it on the back of the bottle. Also, per her post, I used smooth Ball canning jars that have a two-piece cover: a flat metal lid, covered by a screw-on ring. To secure the nipple, place it on top of the metal lid and then put the screw-on ring over it - no adhesive required!


The Decor

Due to a limited budget, I decided to make the decorations for the shower. I hung banners made out of various colors of pink scrapbook paper around the room. To make the banner, first cut out a triangle in the scrapbook paper. Then you can either adhere a string to the back of the triangles, or punch 2 holes at the top of each triangle and thread a string through the holes.


I also made tissue paper pom poms that were hung down the center of the room over the dining table. These are super easy to make and inexpensive - here are the directions.


To decorate the walls, I made a baby carriage holding the new arrival (again inspired by the web) out of foam paper. Stay tuned for more information related to this design coming soon!


I also made an enlarged version of the invitation onesie to hang on the wall. Who knew you could buy mega-sized snaps!


I could see each of these designs easily being adapted for a boy shower or a unisex shower, so I hope they help if you're looking for ideas!


Linking up to:
Visit thecsiproject.com

Friday, December 31, 2010

Happy New Year!

Out of all the cool experiences that I've had in 2010, I would have to say that working on the East Coast/West Coast Tablescape Challenge for the Children's Party Network had the biggest impact on me for a couple of reasons. First, being new on the scene, I was incredibly honored to be asked to participate alongside established party people. Second, the challenge forced me to try different crafting techniques (like my new favorite thing - embossing) that are now a part of my repertoire.

My contribution to the challenge (that we won by the way - go Team East!) were the invitations. Since it is New Year's Eve, I thought it would be fun to show you the initial drafts that I created before committing to the final design - enjoy!

Just to refresh your memory, the challenge was to create black & white themed items for a children's New Year's Eve party. However, our team was further challenged to incorporate the Sunday comics into the designs as well - no pressure!

Design #1: Cartoon Callout Clouds


Design #2: Blinged-out Mickey Clock


Design #3: Old School B&W Mickey Mouse Cartoons


Design #4: My homage to a Jordan Ferney design


The Final Design - pictures courtesy of Artistic Soul Photography:


Hope you have a fabulous holiday - I can't wait to see what 2011 brings!

Friday, December 17, 2010

Dollar Tree Christmas Challenge

Somehow in between holiday shopping, decorating, school parties and planning a baby shower (future post), I found time to enter a holiday craft contest. Dollar Tree is sponsoring a really cool challenge to "create a holiday-themed decoration using materials totaling $20 or less". I stumbled across this contest last week when I was shopping for items for this post. I immediately knew what I wanted to make - see if you can figure it out.

I used these products...


and these too...


Any guesses? It's a gingerbread house!


One of my favorite things is to find creative ways to use items not for their intended purpose. This challenge gave me a lot of chances to do just that. For instance, I used a light brown non-slip shelf liner for the gingerbread walls. I also found some great plastic clothes lines that looked like peppermint sticks - they are used for the trim on the house. But my absolute favorite item on the house is a plastic popcorn container - it's the roof!


The craft that receives the most votes will be declared the winner. The voting period runs from now through Dec 29 (only 1 vote per day is allowed). I would love it if you could swing over to Dollar Tree's site and vote for my little house here (click on the image - a vote button is present in the lower right corner).


Thanks so much for your support!

Wednesday, December 8, 2010

Holiday Decorating on a Dollar

A few weeks ago I stumbled across a cool article that showed how an incredibly crafty lady made a chandelier using Mardi Gras beads from the dollar store - see it for yourself here. So that got me thinking about what kind of fun holiday things I could make using items from the dollar aisles and dollar stores. Here's what I came up with...

Decorative Packing Tape - $1
A while ago I discovered some amazing packing tape in the dollar section at Michael's craft store - here are some of the things I made with that find. I was so happy to see that Michael's is still selling the decorative tape, but this time it's holiday-themed! Here are a few of the styles I picked up:


A super easy use for the tape is to make drinking straw flags. To make these flags, cut a small section of the tape and attach it to a piece of paper. Then cut out a triangle on one end and glue the flag onto the straw.


One other use for the tape is to create place cards (no, I'll never get tired of place cards). I made this card by cutting a section of the tape and attaching it to a piece of cardstock paper. I then cut around the top part of the design and added a label for the name.


Holiday Pipe Cleaners - $1

Whoever came up with the idea of lining the checkout aisle with products was a genius - I fall for it every time! I found these holiday-themed chenille stems while waiting in line at Joann's craft store and just had to have them.


I think it's really cool when words are "written" out using different materials (like twine, ribbon, etc). So I thought I'd spell something using the pipe cleaners...not sure why I chose "MERRY" - it was just the first holiday word that popped into my head. I decided to mount the pipe cleaners onto the side of a box that can be used for a ton of things - in this case holding utensils for a dinner party.


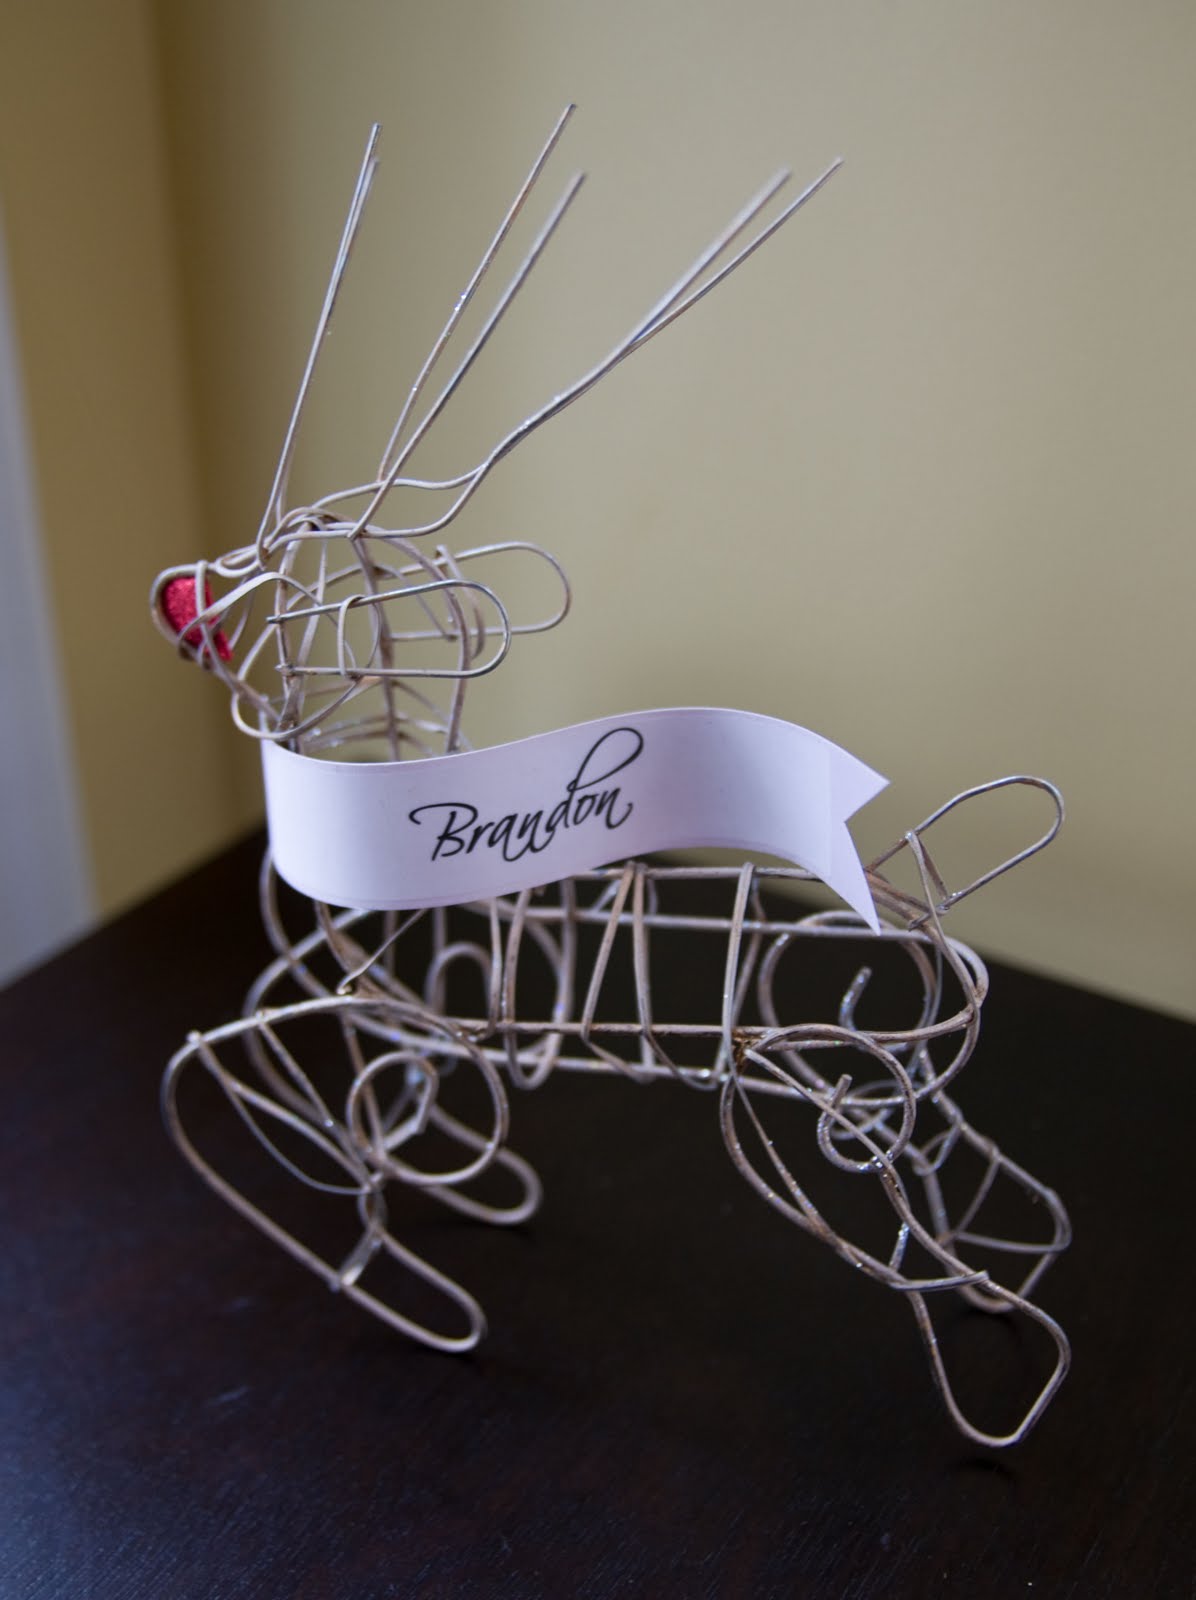
Tabletop Deer - $0.25 (Clearance)

I found this deer in the clearance section at the dollar store. It was so unique (okay, and so inexpensive) that I had to buy it!


This is going to come as a shock and a surprise, but I decided to use this clearance find as a - wait for it - place card. Come on, you gotta love the addition of the little red nose!


Felt Ornaments - $1
Another dollar store find were these felt ornaments. It was the colors that first caught my eye, and then I fell for the intricate designs that are cut in the ornaments.


One super easy way to decorate with the ornament is to mount it onto a charger plate using hot glue. I displayed this one on the mantle along with other holiday decorations...


One other decorating idea for the felt ornament is to make a tabletop tree. One package of ornaments comes with 2 Christmas trees. To create this look, first cut one ornament halfway down the center starting from the top. Then cut the other ornament halfway up the center starting from the bottom. Finally slide the two pieces together to form one tree.


I'm working on another holiday dollar store project right now, so if all goes well I'll share those pics soon.

Wednesday, December 1, 2010

Decorating with Christmas Lights

Last year I racked up on tree lights during my annual day after Christmas shopping spree. I bought a ton of those old school C9 lights (see below) for next to nothing. So now I feel compelled to do something creative with them to justify the purchase.


Here are a couple of super easy things you can make using Christmas lights to decorate your house for the holidays.


Idea #1: A Topiary

Over the summer I participated in (and won!) a Christmas in July contest that Kendra at My Insanity was hosting. Now that December is finally here I can pull out the topiary and display it in my hallway! You can find the directions for creating the topiary here.


Idea #2: A Candle Centerpiece

For this idea you'll of course need Christmas lights, a glass vase and a candle. All you need to do is insert the candle in the vase and surround it with the lights. So easy and kind of nice to look at too!


Here's a close-up...


I love the image of Christmas lights "giving off" candlelight, but one other idea is to place a poinsettia plant in the vase instead of a candle.

Happy decorating!


Blog Template by YummyLolly.com