My family is going to a New Year's Day brunch party tomorrow, so I had to come up with an idea (or two) for a hostess gift. Despite the fact that I've known about the party for well over a week, I somehow waited until the last minute (TODAY) to pull something together. So, here are a couple of DIY gifts that don't take too long to assemble and won't break the bank!
Gift Idea #1: Single Serve Mimosas
I thought it would be cute to give do-it-yourself individual mimosas to the party hostess. Here's what you need...
One 12 oz bottle of Orange Juice
One 187 mL bottle of Champagne
One plastic champagne flute
One small box - I got this one from Hobby Lobby
I padded the box with some fabric scraps and printed out a label for the interior...done!
Gift Idea #2: Coffee, Coffee, Coffee
I'm a Dunkin Donuts coffee girl, so I am sharing the love with the party hostess. I thought it would be fun to come up with a unique card to accompany the coffee. All you need to create the card is hot glue, coffee beans...
and (according to my oldest son) a bad sense of humor...
Wishing you all a very Happy New Year's!
Monday, December 31, 2012
Last Minute DIY New Year's Day Hostess Gifts
Labels:
champagne,
coffee beans,
gifts,
mimosa,
new year's day party,
orange juice
Thursday, November 29, 2012
Heading South for the Winter...
I am completely in denial that November is over - it went by way too fast!
On the contrary, I'm guessing that turkeys are letting out a collective sigh of relief and excitedly hanging up their feathers until next Thanksgiving...
Labels:
feathers,
foam paper,
pilgrim hat,
Thanksgiving,
turkey,
wire hanger
Tuesday, November 13, 2012
Monopoly Moguls in Training
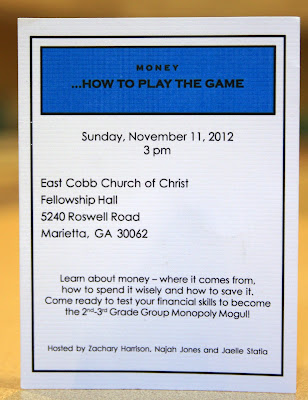
My family recently joined an organization called Jack & Jill of America that provides amazing social and educational programming for African-American children. Each month parents have the opportunity to plan and execute themed activities for the kids. Last weekend I helped create a finance-themed event for my oldest son's group. Fortunately I was paired with a mom named Loren who literally bleeds creativity. She came up with the brilliant idea of teaching financial literacy through the use of a human monopoly game. We created a life-sized game board and the kids (in teams of two) were the game pieces. One team member was responsible for the money and the other held the deeds as they moved around the board. I'll jump to the punchline and tell you that the kids had an absolute blast playing the game! Here are some of the pics from the event...
Loren is the owner of a stationery company called Statianery, so needless to say she created all of the printed products for the event. Those products included:
Invitations...
Personalized Wallets for each child...
Life-sized Dice...
Water Bottle Labels...
Food Signs (the kids had to "buy" their own lunch)...
Custom Monopoly Money...
I had the pleasure of creating monopoly-themed centerpieces for the event. Those centerpieces included:
Monopoly House and Hotel Game Pieces...
Mr. Monopoly...
Various Monopoly Game Pieces...
In addition to playing the monopoly game, we also reviewed financial concepts and handed out this interactive booklet that has great activities about money for kids.
I would definitely recommend the human monopoly game for both kids and adults!
Labels:
dice,
finance games for kids,
game pieces,
monopoly game,
Mr. Monopoly
Monday, October 15, 2012
Halloween Cat Lantern
With Halloween only two weeks away, my youngest son suggested that I make (and I quote) "one of those holiday lantern animal things". Here are my previous attempts at an Easter Bunny, Easter Chick and Thanksgiving Turkey. I decided to let my little guy choose which animal I would do and he threw out a black cat. So, at my son's request, I present a Halloween Black Cat Lantern...
I hope he likes it!
I hope he likes it!
Labels:
black cat,
diy craft,
diy party decoration,
foam paper,
Halloween,
lantern,
paper lantern
Wednesday, September 5, 2012
Better Late Than Never...
So, a couple of years ago I promised to post templates for these Halloween plates that I made...
...but, unfortunately, that never happened. Sorry! However, someone recently asked me about the templates, so I felt compelled to make good on my promise.
Just click on the links below and print the templates. I used foam paper to cut out the shapes and then attached them to 9" round plates using hot glue.
Monster Plate Template
Bat Plate Template
Ghost Plate Template (top)
Ghost Plate Template (bottom)
Linking up to:
Monday, August 27, 2012
He Speaks for the Trees...
My kids are not that into movies, so it is a huge deal when they get excited about one. I was pleasantly surprised when both of my guys gave two thumbs up to The Lorax (Dr. Seuss can do no wrong in my world). So I'm going to surprise them by purchasing the flick on DVD.
Of course I immediately saw this as a crafting opportunity as well! I went back through my craft archives for inspiration and landed on these...
Using the promo picture above as my guide, I roughly cut out the shapes for the Lorax's face using foam paper and hot glued them onto an orange visor. Here's the result...
I'm thinking that my 8-year-old might be past the point of thinking this is cute, but I know that my youngest son will be all in!
Labels:
diy craft,
dr.seuss,
foam paper,
the Lorax,
visors
Friday, July 27, 2012
DIY Olympic Eyeglasses
My husband and I always get giddy about the Olympics and our enthusiasm has been passed onto our kids. We've already pulled out the world map in anticipation for tonight's opening ceremonies. We're even having fish & chips for dinner to make it feel like we're dining in a London pub. Hokey? Absolutely, but it's what we do.
So I had this great idea to make glasses for the boys to wear during our Olympic viewing party. I first bought some plastic glasses at Dollar Tree...
Then I cut out Olympic rings using foam paper...
Then I removed the foam stickers from the glasses and hot glued my rings onto them - here's the result (front view):
(side view)
And finally I bribed my kids to model the glasses...which ended up costing me as much as I spent at Dollar Tree!
This was a super easy project that required very little effort and very little money - in other words, my favorite kind of project!
Labels:
diy craft,
eyeglasses,
foam paper,
Olympics
Friday, June 22, 2012
Patriotic Dollar Store Find - Part I
I'm part of the reason why dollar stores exist in this country. I get completely caught up when I enter one because everything is so affordable! So the other day I found some red and blue miniature watering cans - is it just me, or does everything look irresistible in miniature form?
I also found some red and blue tablecloth weights...
I combined both of those items together to create a party favor for a 4th of July shindig.
This is super easy to make. I bought three watering cans, one can of white spray paint and sisal twine. Since the watering cans and tablecloth weights only came in blue and red, I spray painted one set white. I then removed the clip from the weight and tied it onto the can with twine. Finally I added some hydrangeas from my garden and that's it!
Stay tuned for more patriotic dollar store finds coming soon!
Labels:
4th of July,
party favors,
patriotic,
red white and blue,
stars,
watering can
Tuesday, June 5, 2012
Almost Famous...
I was giddy with excitement when I received the current issue of FamilyFun Magazine in the mail. Why 'giddy' you ask? Because two of the crafts that I originally created for this little blog are featured in the magazine! Here's the cover of the magazine on newsstands now...
Remember this post featuring the bandana placemat and banner? Here is FamilyFun's take on those crafts...
I simply supplied the ideas and they did all the rest...
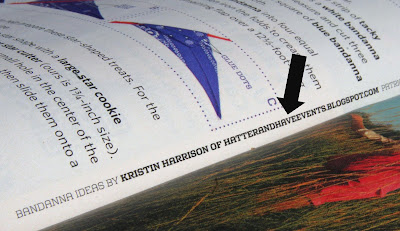
So now that I'd been published, I sat patiently waiting for the call from Martha's people. And waited. After three days with no call, I realized there had to be a problem. I went back to the magazine and there it was...THE WRONG BLOG ADDRESS! Well at least that explains why I hadn't heard from Martha yet!
I am completely honored to have been asked to contribute to a magazine that I love! Thanks so much to FamilyFun for the opportunity to become (almost) famous!!
Subscribe to:
Posts (Atom)